Export Sld Plugin Tutorial
Export SLD Operation Plugin Tutorial
After completing this tutorial, you will have gained the skills to:
- Create a new Plugin
- Define a new Extension
- Implement a new Operation Extension
Create a New Plugin
Open the Plug-in Development perspective (click on
 )
)From the File menu, select New ‣ Project. Select Plug-in Project from the dialog, and then click the Next button.
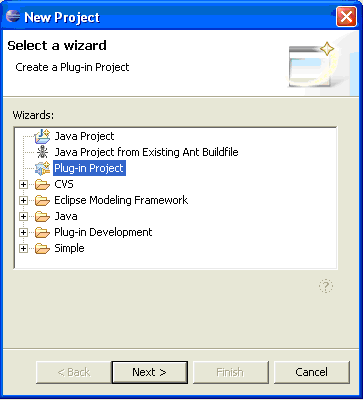
Figure 1 - New Plug-in Project
Create a name for the plug-in by entering org.locationtech.udig.sld.export in the Project Name text field and click the Next button.
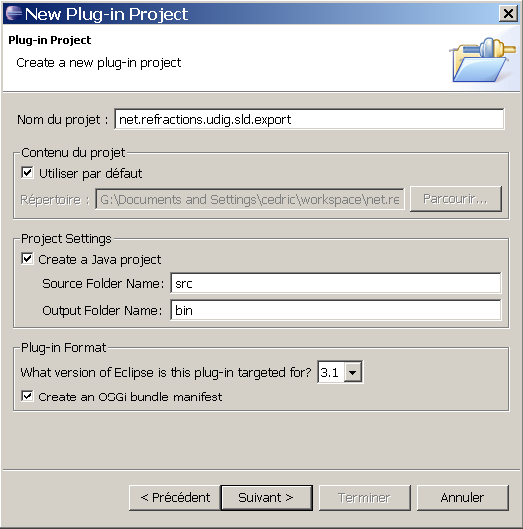
Figure 2 - Naming the New Plug-in
Accept the default values used to generate the plug-in and click the Finish button.
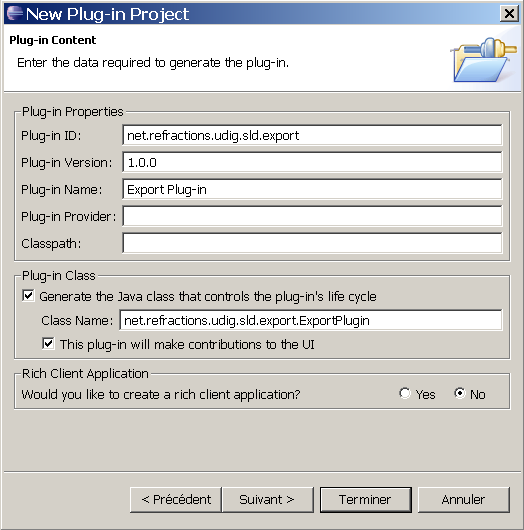
Figure 3 - New Plug-in Details
At this point the feature editor plug-in is created. Configuring the plug-in is the focus of the next section.
Configuring Your New Plug-in
In this section you will configure the feature editor plug-in. Specifically, you will specify dependencies on other plug-ins in order to create a new feature editor.
Open the Plug-in Development perspective.
In the Package Explorer navigate to the plug-in created in the previous section. Open the plug-in manifest by navigating to the META-INF/MANIFEST.MF file under the root of the feature editor plug-in. Double click on the file to open the plug-in manifest editor.
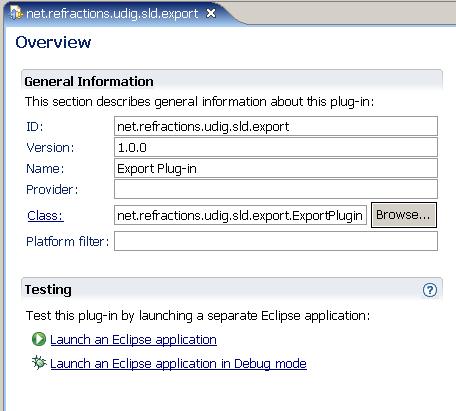
Figure 4 - Plug-in Manifest Editor
Open the plug-in dependencies by clicking on the Dependencies tab located at the bottom of the editor area.
Click the Add button in the Required plugins column and add the following plugin:
org.locationtech.udig.project
org.locationtech.udig.project.ui
org.locationtech.udig.style.sld
org.locationtech.udig.udig.ui
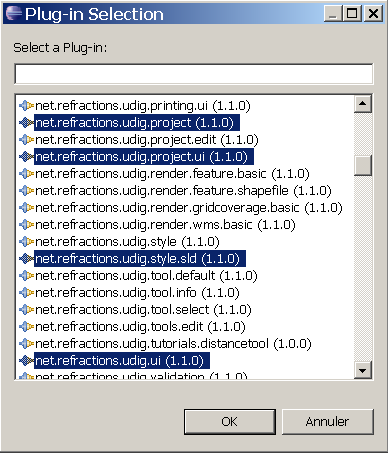
Figure 5 - Add New Plugin Dependencies
At this point it is critical that you
 Save your work as the dependencies need to
propagate into the project.
Save your work as the dependencies need to
propagate into the project.
Figure 6 - Plug-in Dependencies
Import Resources Into Project
In this section we are going to set up an icon directory and import the pictures we will use for our export SLD operation.
Download Export SLD Plugin Tutorial and Export SLD Plugin Tutorial to your desktop (Right click and Save Link As...)
Select your plug-in project, org.locationtech.udig.tutorials.distancetool, in the Package Explorer.
Select File ‣ New ‣ Folder from the Menubar.
Enter icons/etool16 as the folder name.
Click the Finish button.
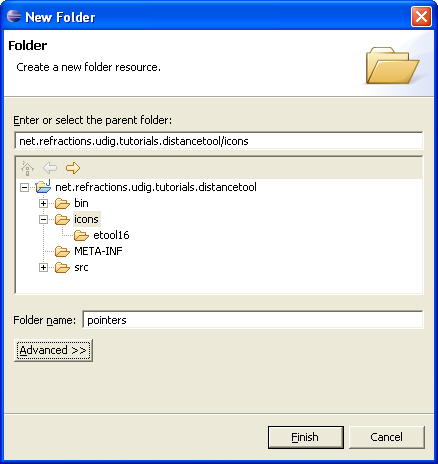
Select icons directory.
Select File ‣ New ‣ Folder from the Menubar.
Enter pointers as the folder name.
Click the Finish button.
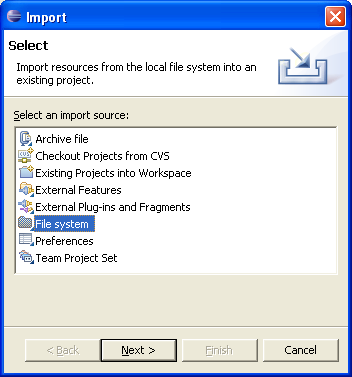
Right click on etool16 and select Import.
Select File System.
Click on browse and choose Desktop from the list (this will populate the directory field).
Select the measure_mode.gif file and press Finish.
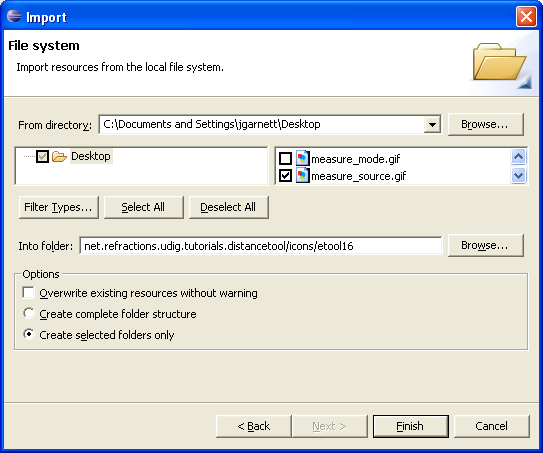
Import the measure_source.gif file into the pointers directory following the same steps.
Define a New Extension
Open the extensions page by clicking on the Extensions tab
Click the Add button
Select the org.locationtech.udig.ui.operation extension point from the list.
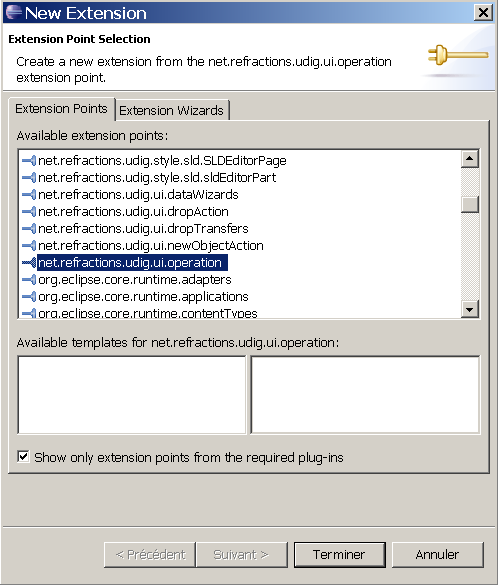
Click the Finish button.
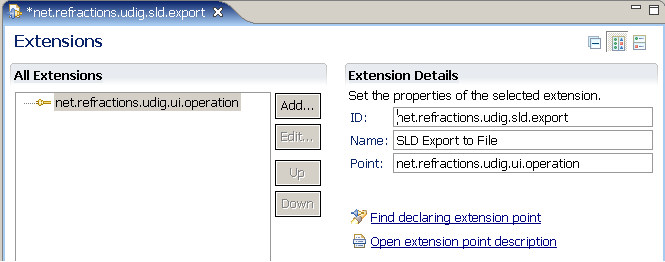
Enter the following Extention Details:
- ID: org.locationtech.udig.sld.export
- Name: SLD Export to File
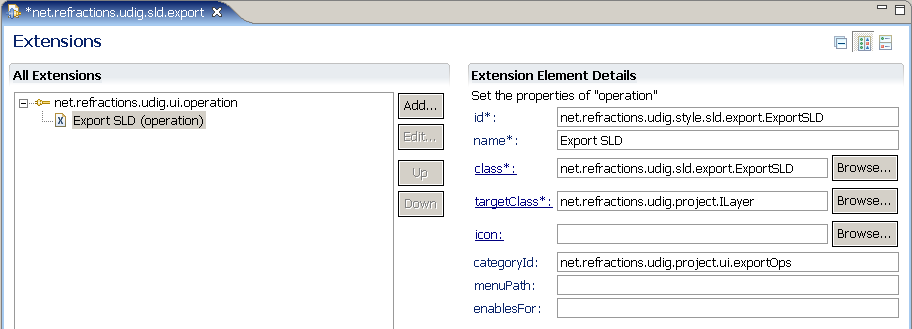
Create a New Operation
Right click on newly added extension, org.locationtech.udig.ui.operation, and select New ‣ Operation
Replace the default data in the id field with org.locationtech.udig.style.sld.export.ExportSLD.
Enter org.locationtech.udig.sld.export.ExportSLD into the class field.
Enter icons/etool16/ into the icon field. (Or press the Browse button and locate the icon)
Enter Export SLD into the name field.
Enter org.locationtech.udig.project.ui.exportOps into the categoryId field.
Implementing a export operation
Select org.locationtech.udig.style.sld.export.ExportSLD (operation) in the Extensions editor.
It is a child of the org.locationtech.udig.style.sld.export.
Click the class hotlink.
A dialog is brought up describing the class to be created, Check Generate comments and Inherited abstract methods.
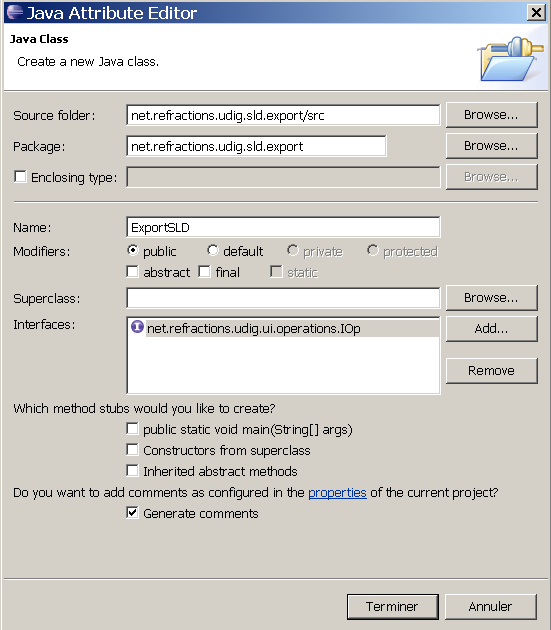
Press Finish, if not available ensure that all the information is in agreement with the picture above.
Add the following code to your created class
public class ExportSLD implements IOp {

    public class QueryAndSave implements Runnable {

        private String out;
        private Layer layer;
        private IProgressMonitor monitor;
        private Display display;

        public QueryAndSave( Layer layer, String out, Display display, IProgressMonitor monitor ) {
            this.layer=layer;
            this.out=out;
            this.display=display;
            this.monitor=monitor;
        }
        File file;
        public void run() {
            do{
                if (!getFile())
                    return;
                boolean write=true;
                if( file.exists() ){
                write=MessageDialog.openConfirm(display.getActiveShell(), Messages.getString("ExportSLD.saveAs"),  //$NON-NLS-1$
                            file.getAbsolutePath()+Messages.getString("ExportSLD.exists") + //$NON-NLS-1$
                                    Messages.getString("ExportSLD.replace")); //$NON-NLS-1$
                }

                if( write ){
                try {
                    FileWriter writer=new FileWriter(file, false);
                    writer.write(out);
                    writer.close();
                } catch (Exception e) {
                    file=null;
                    MessageDialog.openError(display.getActiveShell(), Messages.getString("ExportSLD.saveAs"),//$NON-NLS-1$
                            Messages.getString("ExportSLD.modifyError")); //$NON-NLS-1$
                }
                }else{
                    file=null;
                }
            }while( file==null );
        }

        private boolean getFile() {
            FileDialog fileDialog=new FileDialog(display.getActiveShell(),SWT.SAVE);
            fileDialog.setFilterExtensions(new String[]{"*.sld"}); //$NON-NLS-1$
            fileDialog.setFilterNames(new String[]{Messages.getString("ExportSLD.SLD")}); //$NON-NLS-1$
            String name=layer.getName();
            if( name==null ){
                try {
                    name=layer.getGeoResource().getInfo(monitor).getTitle();
                } catch (IOException e) {
                    ExportPlugin.log("error getting name from layer's georesource", e); //$NON-NLS-1$
                }
                if( name==null ){
                    try {
                        name=layer.getGeoResource().getInfo(monitor).getName();
                    } catch (IOException e) {
                        ExportPlugin.log("error getting name from layer's georesource", e); //$NON-NLS-1$
                    }
                }
            }
             if( name!=null)
                 fileDialog.setFileName(name+".sld"); //$NON-NLS-1$
            String path=fileDialog.open();
            if( path==null)
                return false;
            file=new File(path);
            return true;
        }
    }
    public void op( Display display, Object target, IProgressMonitor monitor ) throws Exception {
        Layer layer=(Layer) target;
        Style style=(Style) layer.getStyleBlackboard().get(SLDContent.ID);

        // serialize out the style objects
        SLDTransformer sldWriter = new SLDTransformer();
        String out = ""; //$NON-NLS-1$
        try {
            out = sldWriter.transform(style);
        } catch (TransformerException e) {
            ExportPlugin.log(null, e);
            e.printStackTrace();
        } catch (Exception e) {
            ExportPlugin.log(null, e);
        }
        display.asyncExec(new QueryAndSave(layer, out, display, monitor));
    }
}
- Click the OK button.
- And then save the file. This should refresh the project and clear up any error markers left behind.
Testing The Plug-in
- From the Project menu select Run and choose the configuration you set-up in the previous tutorial (see SDK Quickstart).