SDK Quickstart

Introduction
This workbook is aimed at those doing plug-in development against the uDig platform. Follow these instructions to quickly set up a development environment for working on your own plug-ins.
Eclipse is familiar to most developers as a Java Integrated Development Environment (IDE). The Eclipse IDE can be extended with additional “capabilities” to work with alternate programming languages (like C++ or Ruby), or additional subject matter such as Java Enterprise Edition or in this case Eclipse Plug-in development.
In this Quickstart we are going to use the Eclipse Plug-in Development capability; with the uDIG SDK as the target platform. This workbook covers setting up a development environment for working on your own plug-ins.
If you have an existing Eclipse installation please do not skip this tutorial – we are going to very carefully set up a copy of Eclipse with a few more additional tools then you are perhaps used to.
The Eclipse developers themselves make use of the Plug-in Development Environment (PDE) day in and day out – so it has gotten a lot of polish over the years. In some respects it is more polished then the Java development environment (with custom editors for all kinds of little files).
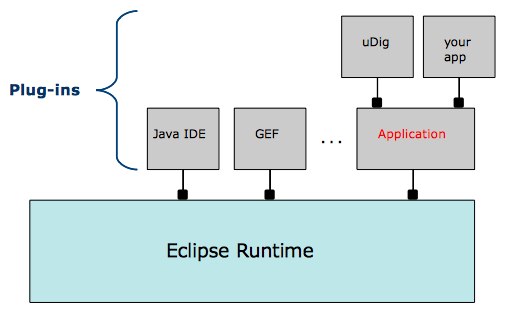
Some of the terminology used when working with the PDE:
- Everything is a Plug-in
- A plug-in can implement an extension
- A plug-in can provide an extension-point for others
Please keep these ideas in mind – even an “Application” is considered an extension when working with the Eclipse Platform.
Downloads
We are going to start by downloading all the software we need; we will be able to proceed with installation as we wait for some of the larger downloads.
Note
If you are using this work book in a lab setting you will find these downloads available on your course DVD.
Target Platform Downloads
For uDig 1.3 we are going going to download the latest SDK from here:
http://udig.refractions.net/download/
Early access downloads are available here:
http://udig.refractions.net/download/unstable/
At the time of writing the latest uDig SDK was: udig-1.3.3-SNAPSHOT.zip
Download Eclipse RCP Delta Pack
http://download.eclipse.org/eclipse/downloads/eclipse3x.html
Download the RCP-Delta Pack from you will need to choose the “Latest Release” build; and the scroll down to the “Delta Pack” link to download.
At the time of writing: eclipse-3.7.2-delta-pack.zip
IDE Downloads
Visit and click on the link for “Eclipse Modeling Tools” and download the appropriate:

Tested with Eclipse Indigo 3.7.2 Packages :
eclipse-modeling-indigo-SR2-win32.zip
Hint
New for uDig 1.3.3 is the ability to use the uDig SDK as a stand alone target platform. This allows you to use a newer version of the Eclipse IDE than the one referenced by the uDig SDK.
We have prepared an “dropins” download in the following folder:
http://udig.refractions.net/files/downloads/extras/
This download includes a developers guide for udig, and a resource bundle editor.
At the time of writing: dropins-3.7.2.zip
Download a Java Runtime Environment from this folder:
http://udig.refractions.net/files/downloads/jre/
This is a special JRE that has been extended with Java Advanced Imaging and Image IO and GDAL for spatial image formats.
Note
GDAL support is provided by the imageio-ext project started by GeoTools alumni.
At the time of writing: jre1.6.0_25.win32_gdal_ecw.zip
Hint
Please ensure your Eclipse IDE and jre match (both win32 – or both win64).
Eclipse SDK Installation
When your eclipse download has finished and we can begin to installation.
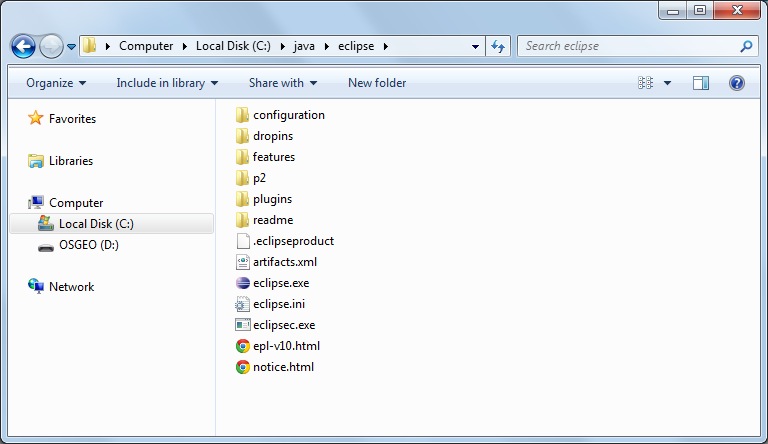
Create a folder: C:\java\
Unzip the downloaded eclipse-modeling-indigo-SR2-win32.zip file to your directory – the folder C:\java\eclipse will be created
Warning
Unzipping using windows does not support long filenames.
Hint
If you need a good program to unzip archive files try 7zip.
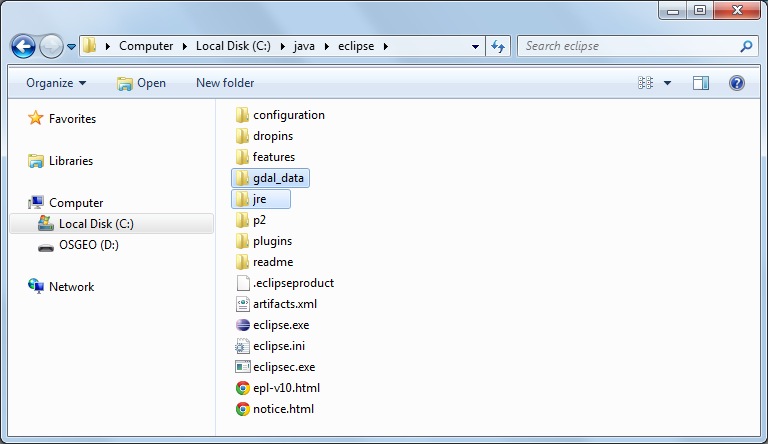
Open up the jre zip file Drag from the 7zip window.
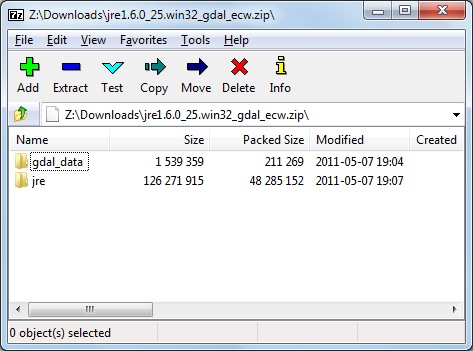
Drop into your C:\java\eclipse
Hint
The folder must be called “jre” for the eclipse.exe to recognize it.
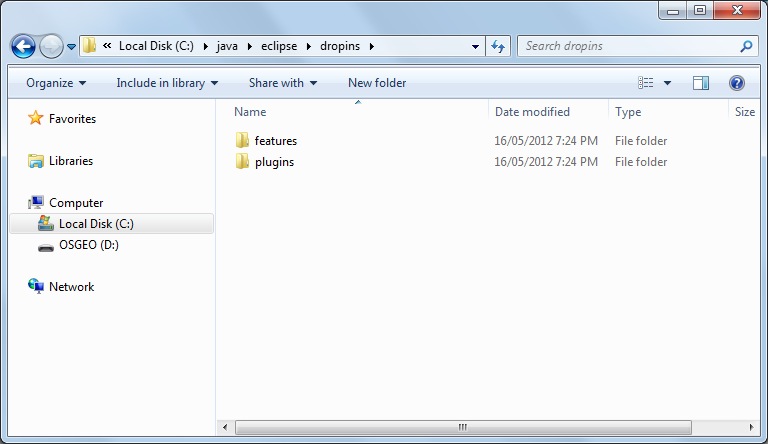
Unzip the dropins file to your eclipse/dropins folder. The download will add additional plug-ins and features to to your eclipse installation without getting mixed up with the bare-bones eclipse.
Warning
Be careful when extracting this zip not to get something silly like dropins/dropins.
Navigate to C:\java\eclipse and right-click on the eclipse.exe file and select Send To ‣ Desktop (create shortcut).
Note
You may want to modify the “eclipse.ini” file to specify additional command line options such as more memory.
Eclipse Workspace
The Eclipse IDE keeps track of what you are doing in a workspace. You can have several workspaces (often for different projects) each with its own configuration.
Double click on your desktop short cut to start up eclipse. When you start up eclipse for the first time it prompt you for a workspace.
Choose a workspace for your sdk development: C:\java\workspace

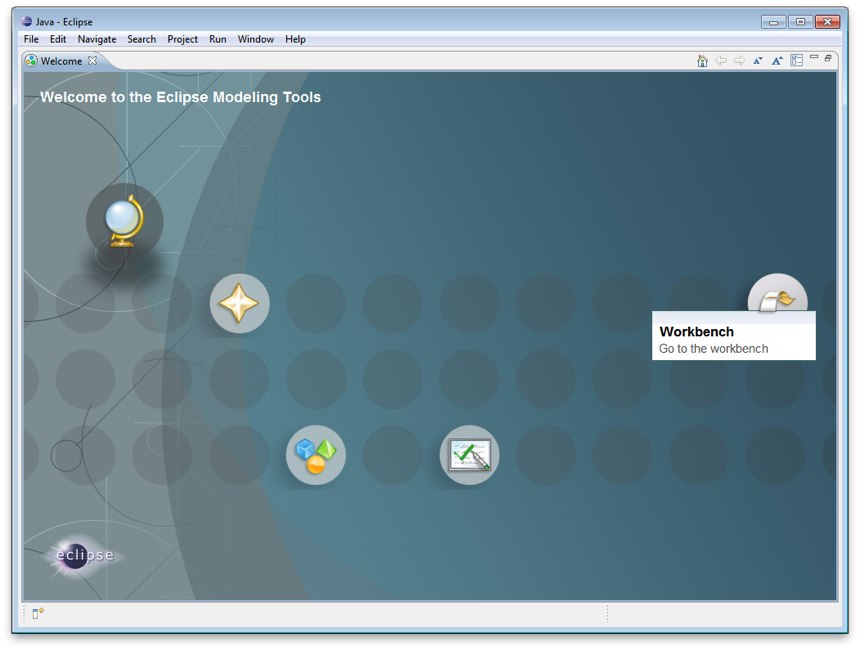
Wait a few moments while eclipse starts up.
On the Welcome view press the Workbench button along the right hand side.
Eclipse Preferences
We have a few global settings to configure before we can proceed.
Note
We are waiting for a Mac OSX JRE to be available before using Java 7.
Open up Window ‣ Preferences from the menu bar.
Navigate to the Java ‣ Compiler page and change:
- Compiler compliance level: 1.6
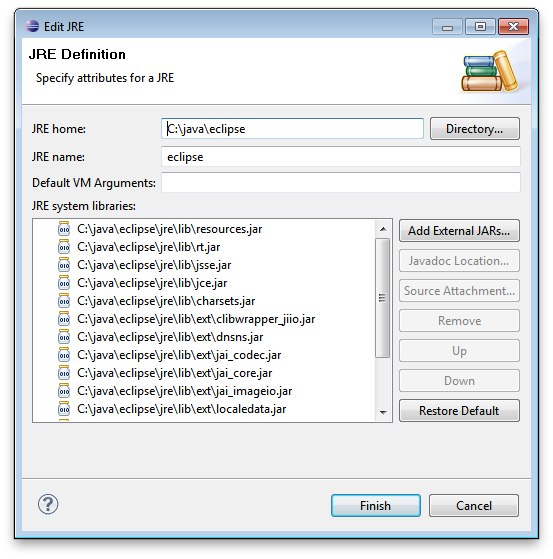
Check the Java ‣ Installed JREs page:
Should have Location: C:\java\eclipse
If the setting is not correct you can use the Add.. button and create a JRE entry for C:\java\eclipse
You can press Edit to look at the installed JRE.
Regardless of platform we are interested in making sure jai_core.jar, jai_imageio.jar and jai_codec.jar are available.
Note
On OSX we are not able to provide a JRE for you to download – uDig will install JAI and ImageIO when run for the first time.
As a result of these changes, Eclipse may prompt you to perform a clean build.
Simply accept this request; it won’t take long since we don’t yet have any source code.
uDIG SDK Target Platform
We are now going to unpack the udig sdk and use it as our target platform for plug-in development:
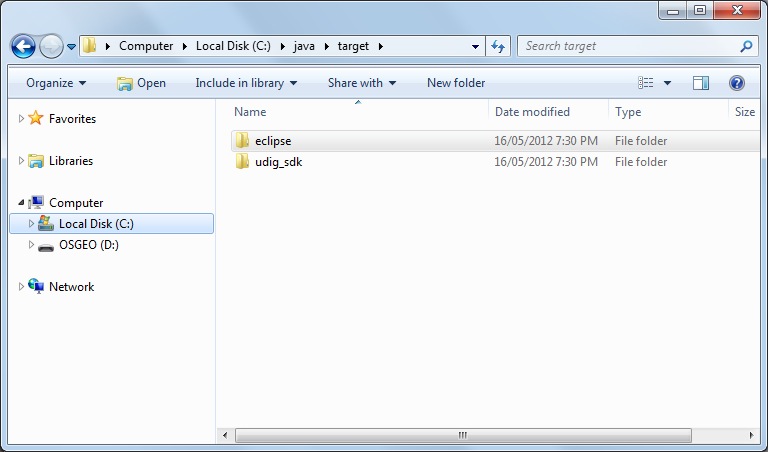
Extract the udig sdk download into C:\java\target\udig_sdk
Extract the eclipse-delta-pack download into C:\java\target\eclipse
You will be left with the following directory structure:
Go back to eclipse and open Window ‣ Preferences.
Select the Plugin Development ‣ Target Platform page.
Press the Add button to start a new target definition.
Choose Default as we are going to include the eclipse plugins.
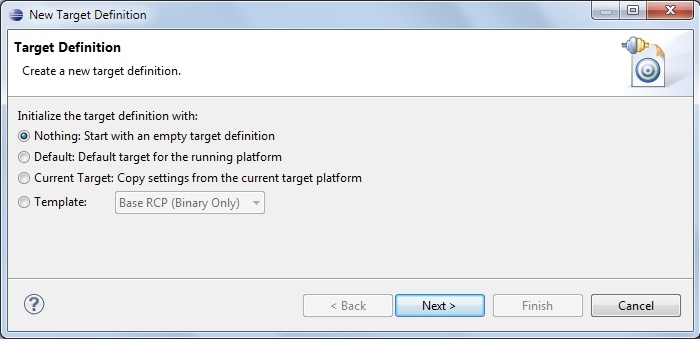
Press Next to continue. This will open the “Target Content” page.
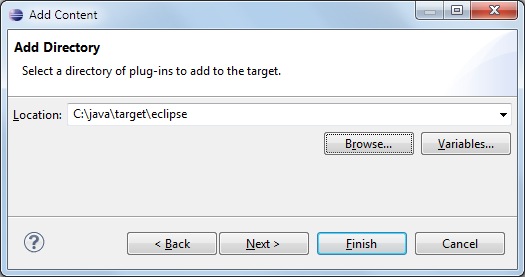
Press the Add button and add a Directory. Choose the C:\java\target\eclipse directory where you unpacked the eclipse-delta-pack.
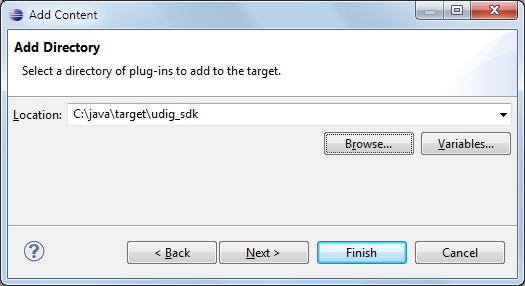
Press Add... again and add the C:\java\target\udig_sdk directory.
Change the name to “uDig SDK” and confirm all three folders are listed.
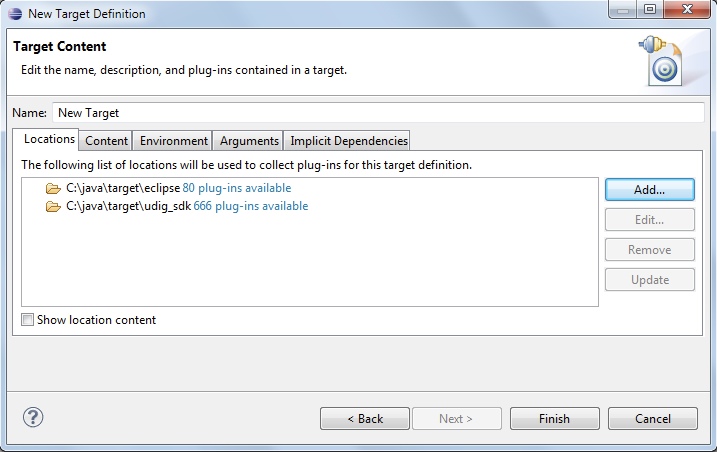
Press Finish to complete the “uDig SDK” target platform.
Back in the Target Platform preference page tick the checkbox next to the “uDig SDK” so it will be the Active target platform.
Press OK.
At this point all the source code for the Eclipse and uDig plug-ins are available. We can now start working on uDig plug-ins, but before we do that lets try running the application.
Running uDig
With all this in place we can now run the uDig application from your development environment. This is a good way to test that everything is installed correctly.
To start out with we will switch to the Plug-in Development perspective;
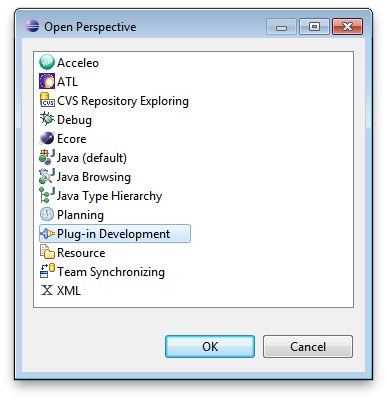
In the top right of the toolbar you can choose Other to open the Open Perspective dialog
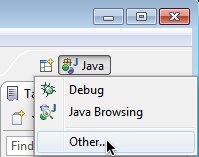
Chose Plugin-Development from the list and press OK
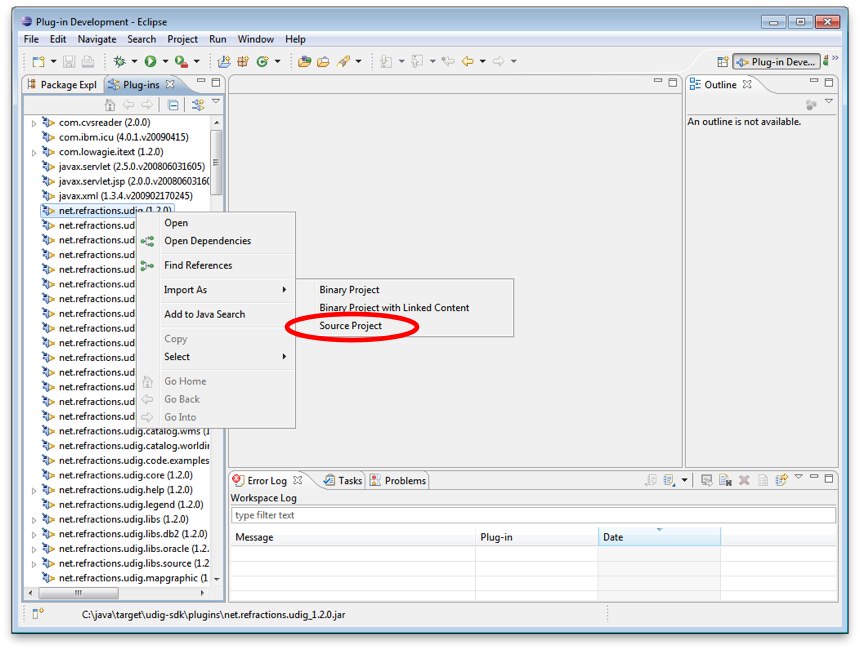
Click on the Plugins view and right click on org.locationtech.udig plug-in the list. Select Import As ‣ Source Project to copy the plugin into your workspace.
Change to the Package Explorer view and open up the org.locationtech.udig plugin and double click to open udig.product.
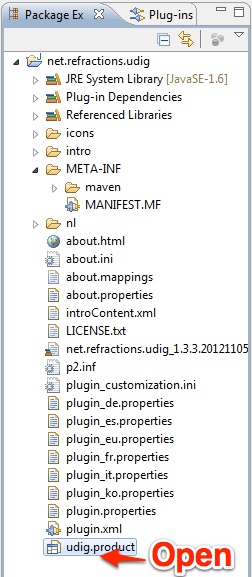
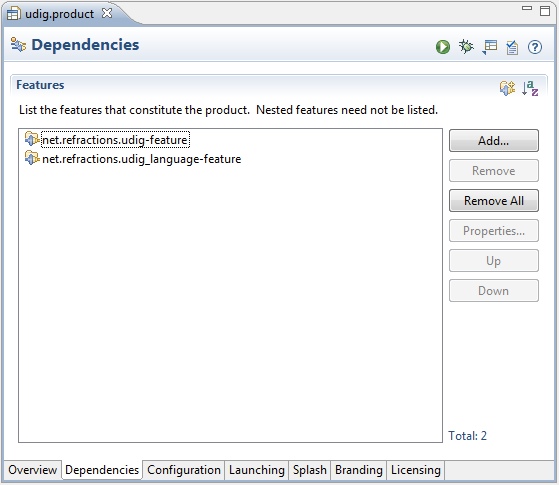
Switch to the dependencies tab and review the features required for the product.
Return to the overview tab of udig.product click on the Launch Eclipse Application link (it is located under testing as shown below).
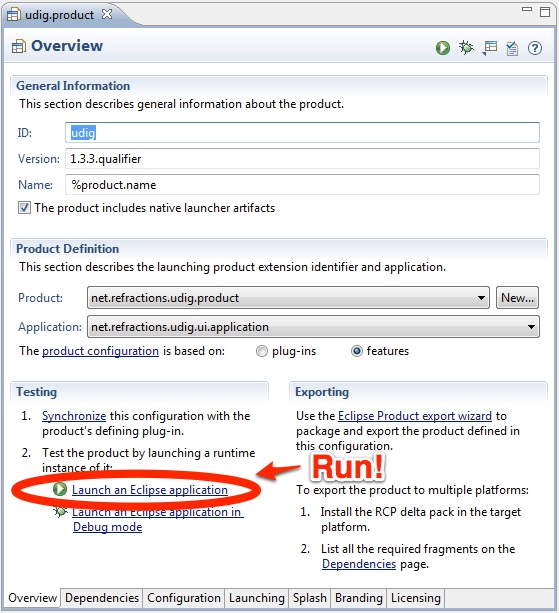
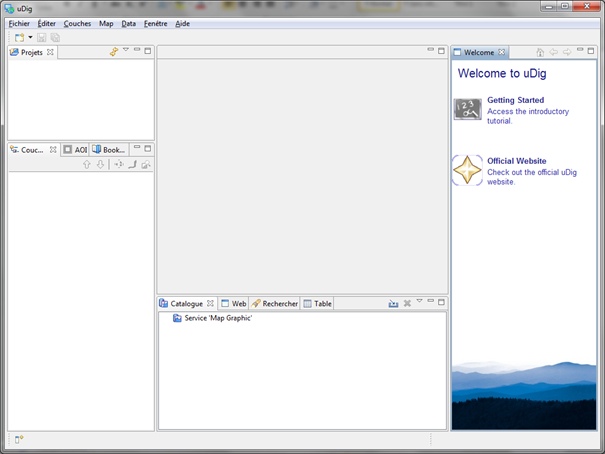
The application will now start!
What to Do Next
Here are some additional things to try when running uDig.
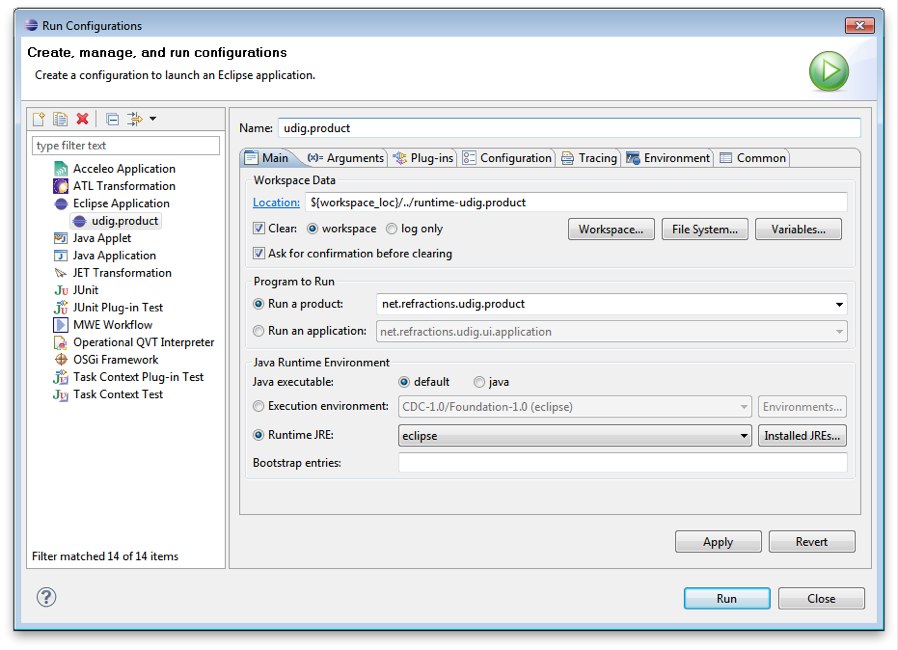
From Eclipse open up Run ‣ Run Configurations to examine or customize configuration of uDig you are running. Many of these fields were filled in for you by the udig.product.
The number one tip is to go to the Arguments tab and enable console logging. To send log information to the console as udig runs add:
-consolelog
to your “program arguments”.
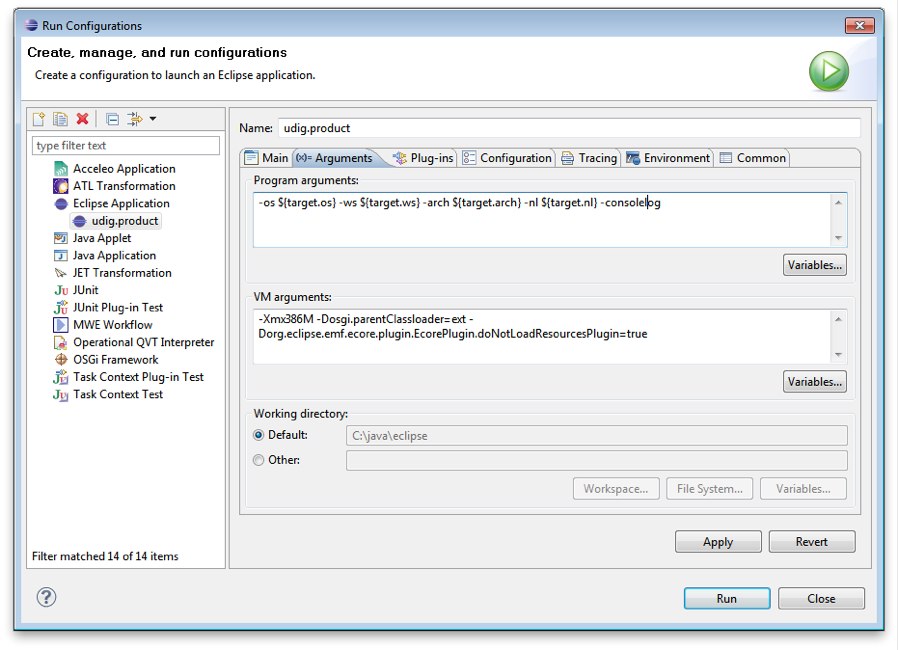
You can also review the VM arguments; including changing the amount of memory available to your uDig application:
-Xmx512m
may be useful when working with large images? The:
-Dosgi.parentClassload=ext
setting allows uDig to find JRE extensions such as Java Advanced Imaging and ImageIO.
Hint
For documentation on these command line parameters check the eclipse help menu.
The running uDig application makes use of the “Workspace Data” folder defined in the Run dialog. Try checking clear and workspace in order to simulate starting uDig from a fresh install.
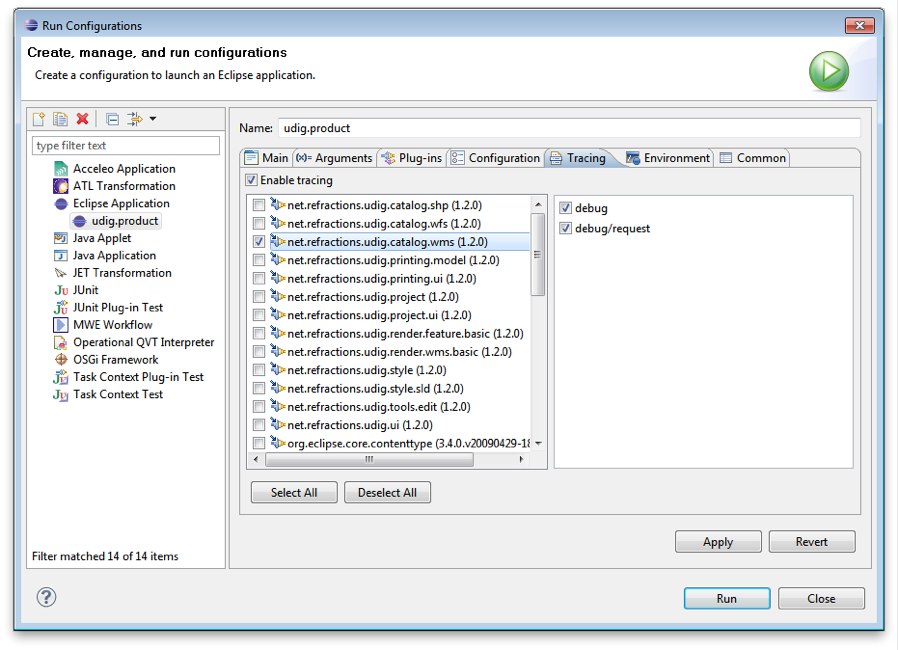
Have a look on the Tracing tab of the Run dialog; you can control the amount of logging information produced (for example WMS logging is turned on below).
Hint
Tracing is especially useful when the -consolelog program argument is used.
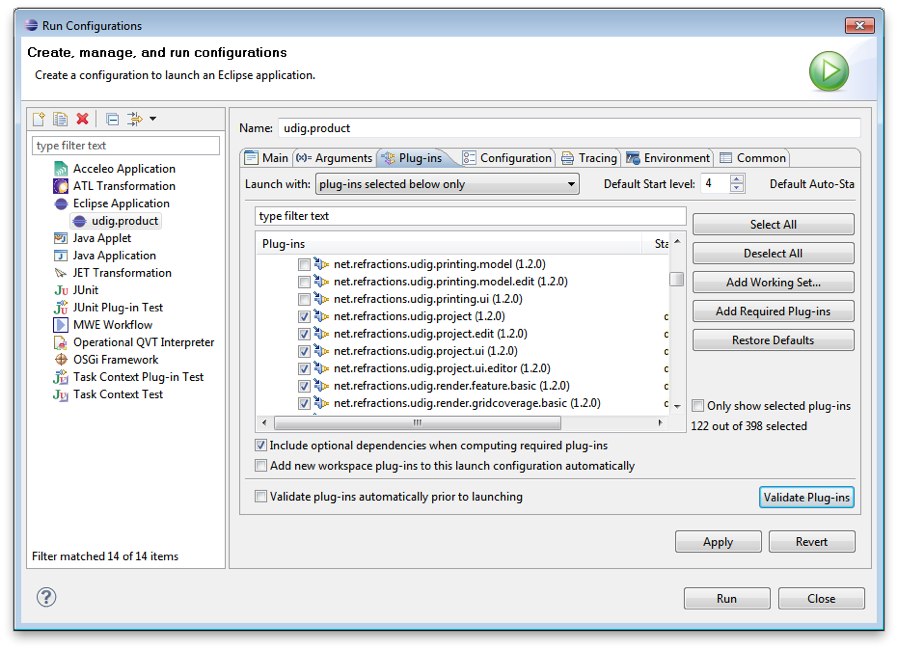
Have a look at the plug-ins tab and see if you can turn off: printing support.
Hint
Normally the plugins included by an application are organized into features – we will cover how to do this in the Custom Application Tutorial.
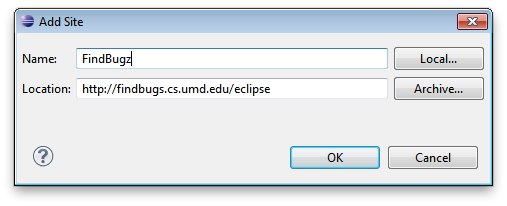
Advanced: When working on the uDig project itself we use the FindBugz tool to check for obvious mistakes prior to committing. You can add FindBugz to your environment using the following update site:
http://findbugs.cs.umd.edu/eclipse
Tips, Ticks and Suggestions
The following tips, tricks and suggestions have been collected from the udig-devel email list. If you have any questions feel free to drop by and introduce yourself.
ClassNotFoundException at EclipseStarter
If your uDig application fails to load due to a ClassNotFoundException at org.eclipse.core.runtime.adaptor.EclipseStarter then we have a problem with the plugin dependencies. The EclipseStarter is doing its best to load the UDIGApplication; however the UDIGApplication is not available as the Platform refused to load the org.locationtech.udig.ui plugin as some of the dependencies were not available.
This usually happens each time we update the version of Eclipse we use. Each version of eclipse changes the plugins required; requiring us to review and examine the plugins we include in our SDK.
As a temporary measure:
- Open up your Run Configuration
- Navigate to the Plugins tab
- Hit “Verify Plugins” (to list the plugins that failed to load; you should see that org.locationtech.udig.ui is in this list)
- Hit add required plugins
Please email the udig-dev list; and volunteer to test the SDK with the version of eclipse you are using.
NoClassDefFoundError JAI
The class JAI is provided as part of the custom jre you downloaded. In order for uDig to see this class it needs to be run using the “ext” classpath. This information is part of the udig.product file you run during the SDK Quickstart.
For reference here is the command line option it sets:
-Dosgi.parentClassloader:ext
Linux
Please follow the same procedure; there is a “prepackaged” JRE available for you in our http://udig.refractions.net/downloads/jre/ folder.
Please don’t do anything tricky like trying to “app get” a copy of Eclipse and Java; version numbers are important and we are setting up this environment very carefully.
If you would like to patch up your system Java you can do so by installing the versions of JAI and ImageIO mentioned above.
Mac OS-X
The Java included with your operating system is “good enough” for now - JAI is already installed on Tiger and Leopard. Some raster formats may not work out.
How to build uDig from Source Code
If you are interested in taking part on trunk development please consider these instructions for checking out and building uDig.
JVM Terminated with Exit Code=-1
If you have a really old machine with lots of versions of Java installed you may be in trouble! If you start eclipse and big dialog saying JVM Terminated with Exit Code=-1 then add the following to your command line options:
-vm C:\java\eclipse\jre\\bin\javaw.exe
This will force eclipse.exe to use the jre you downloaded.