Branding Imagery
Now that your branding plug-in is created we need to provide a little bit of content before we get down to coding and configuration. An important aspect of defining a new product is the all important visual identity.
Fiddling around with drawing programs is a bit beyond the scope of this workbook but we can quickly cover what is needed.
splash.bmp
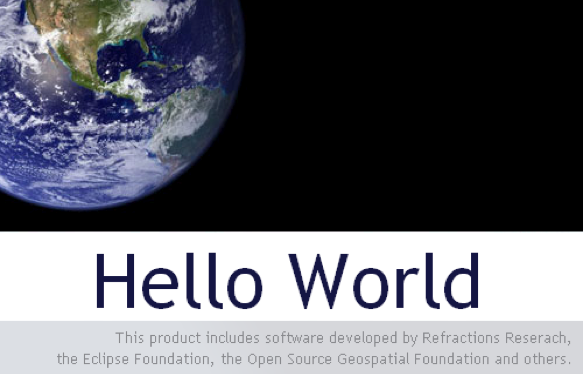
The splash screen must be in bmp format, it is actually read by a C++ program responsible for launching your application. The recommended size for this image is 500x330 pixels.
about.gif
The about image is limited to the gif format, the maximum limit is 500x330, for images smaller than 250x330 you have the option of including your own text and html links in the about dialog.
Window images displayed by the operating system.


gif files sized 128x128, 64x64, 48x48, 32x32, 16x16
Assorted icons
icons/elcl16 icons/dlcl16 Used on a view tool bar actions. (16x16 left and top clear) icons/etool16 icons/dtool16 Used in application tool bar and menu bar (16x16 left and top clear) icons/obj16 Used in trees to represent objects or ideas (16x16 centered, bottom clear) icons/ovr16 Used to decorate a obj16 icon to indicate state (7x8 one pixel white outline) icons/wizban Banner used in wizard dialog windows (55x45 bottom left on a blue gradient) Enough of that - lets download the files we need and keep going. If you have any questions please consult the Eclipse User Inferface Guidelines
Download the following file: rcp_branding.zip
Note
If you are using this workbook in a lab setting you will find the file rcp_branding.zip on your dvd.
Select File ‣ Import to open up the Import wizard
Choose General ‣ Archive File and press Next
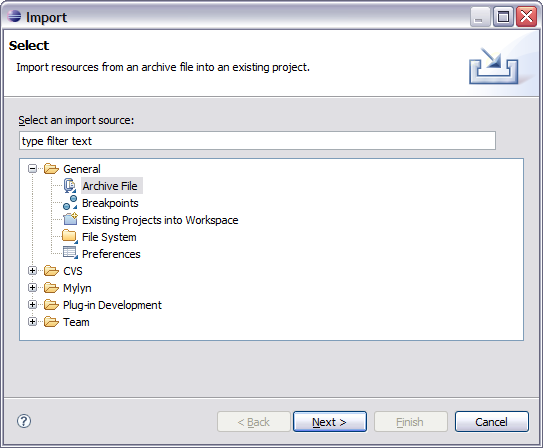
Fill in the following details on the Archive file page:
From archive file: rcp_branding.zip
Into folder: org.locationtech.udig.tutorials.customapp
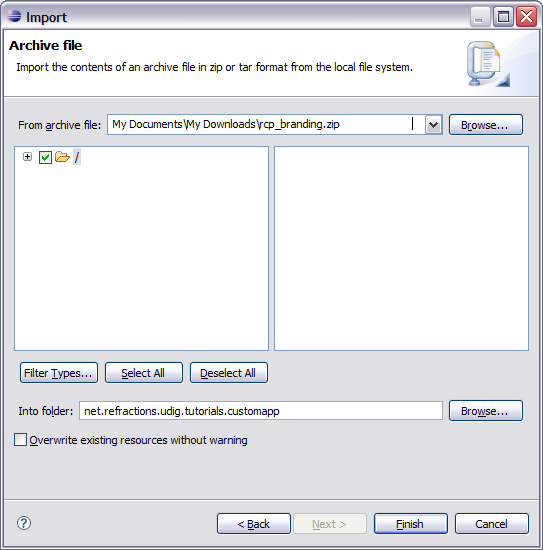
Press Finish, two folders will be added to your project.
There is an “nl” folder with language specific branding; and an icons folder.