Working With Features
This page explains how to create a Feature for one or more of your Plug-ins. A Feature is a bundle of Plug-ins. The main reasons for creating a Feature are:
- Logically group together a number of plug-ins for distribution together
- Group Plug-ins together for use with an update site
- A Feature has (optional) Branding information associated with it, for example About information and Icons that appear in the Help>About ... Dialog
Products can be created from Plug-ins or Features, but if they are created from Features then an update site can be used to keep the product up-to-date. This cannot be done with out a Feature based product.
New Features can also be installed by the Eclipse update framework. If a Feature is added to an update site then any Eclipse based application can install the Feature using the Software Updater (usually under the Help menu).
Creating a Feature
Create a Feature Project. New ‣ Project.
Select Feature Project in the Plug-in Development category
The naming convention is:
Feature ID - An ID usually URI.featureName for example net.refractions.community.jody.visual
Feature Project - the Feature ID with _feature appended to the end.
Feature Name - Unimportant but should usually be translatable (%feature.name in the feature.xml and the key/value pair in the plugin.properties)
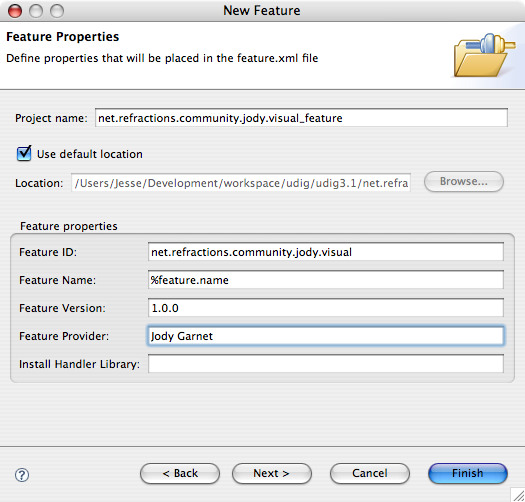
Press Finish
A nice editor for the Feature.xml is opened. In the Branding Plug-in Field enter the Branding plug-in you created for this feature (or enter the name of the Branding plug-in you are going to create).
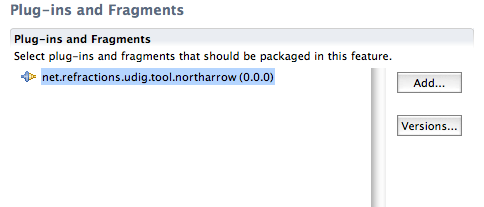
Switch to the Plug-ins tab of the editor (tabs are across the bottom)
Press Add ...
Select the Plug-ins that will be part of the Feature
There is numerous other options for specifying what Features and Plug-ins the Feature depends on as well as what versions and how to install the Feature. This is all that is really required to make a Feature.
Exporting a Feature
- Open the feature.xml file
- Switch to the Overview tab
- Press Export Wizard
- Follow wizard’s instructions
Here is a good link: