Testing Plugins
Writing Test Plugins
Writing a test plugin is no different from writing a regular plugin. After creating your test plugin, simply creating test cases the usual junit way by extended org.junit.TestCase.
Note
The junit library is bundled as the org.junit plugin. Your test plugin must depend on it.
Optional: Unless it is necessary, we recommend placing junit tests for a particular plugin, in a separate plugin all together. The only downside to doing so is the loss of the ability to use package visiblity.
uDig Support Classes
There are a few classes to assist writing uDig tests.
In org.locationtech.udig.ui.tests:
- UDIGTestUtil - Provides methods for:
- Creating Features
- Creating GeoResources
- Creating Services
- Waiting for UI events to complete
In org.locationtech.udig.project.tests:
- MapTests - Provides methods for creating maps
- AbstractProjectTest - Super class for test cases. Attempts to clean up after running by clearing the project registry, maps, and projects
In org.locationtech.udig.project.ui.tests:
- AbstractProjectUITest - Extends AbstractProjectTest and tries to close mapeditors in addition to what AbstractProjectTest does..
Naming Conventions
The naming convention for plugins is [namespace].[major subsystem].[minor subsystem]. Examples include:
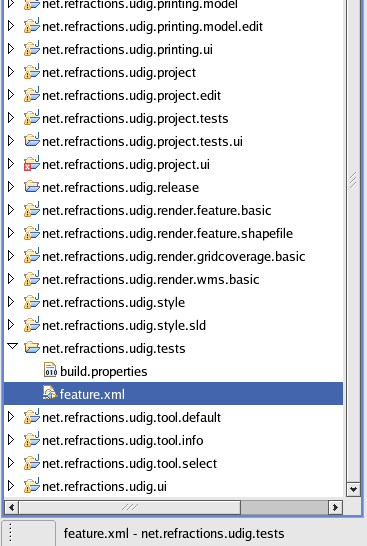
the feature.xml file

org.locationtech.udig.catalog
org.locationtech.udig.catalog.wfs

org.locationtech.udig.project
net.refractoins.udig.project.ui
the feature.xml file
The naming convention for test plugins is [namespace].[major subsystem].tests.[minor subsystem]. Examples include:
org.locationtech.udig.catalog.tests
org.locationtech.udig.catalog.tests.wfs

org.locationtech.udig.project.tests
net.refractoins.udig.project.tests.ui
Running Tests in the IDE
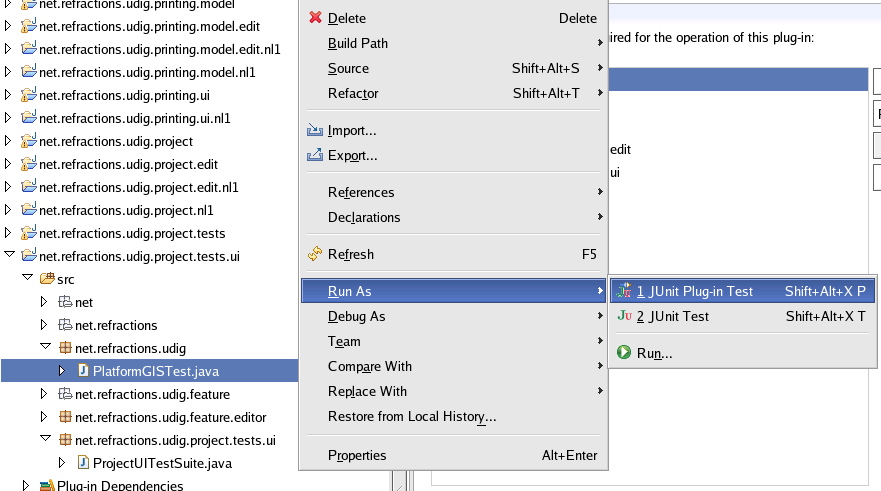
After creating a test case in your new test plugin, right click on the class while in the Java perspective, and the context menu should contain a menu item entitled Run As ‣ JUnit Plug-in Test. This will start an eclipse runtime environment and run your test class.
Running Automated Tests
In order to have your test plugin run with the rest of the automated test plugins, the following steps must be taken:
- Create a test suite
- Create a test.xml from the template
- Add your test plugin to the org.locationtech.udig.test feature
- Add your test plugin to the automated test set
Creating a Test Suite
A test suite is a java class which extends junit.framework.TestSuite. Each test class you write must be added to the test suite. The following is an example of a test suite which contains three test classes.
public class CatalogUITestSuite extends TestSuite {

    /** Returns the suite. This is required to use the JUnit Launcher. */
    public static Test suite() {
        return new CatalogUITestSuite();
    }

    public CatalogUITestSuite() {
        addTest(new TestSuite(HeadlessWizardDialogTest.class));
        addTest(new TestSuite(BasicDataPipelineTest.class));
        addTest(new TestSuite(BasicDataPipelineDialogTest.class));
    }

}
Warning
The test suite must provide an implementation of a method with the following signature, which returns an instnace of the suite
public static Test suite();
Creating the test.xml Script.
The test.xml file is an ant build script which runs your unit tests. The following is a template test.xml of such a script. Located near the top of the file are three properties which must be modified to reflect your particular test plugin. The properties include:
- plugin-name - This is name of your test plugin. For simplicity, keep it the same as the id of your plugin.
- testClass - This is the fully qualified class name of your test suite.
- testTarget - This is the name of ant target which will be used to run your tests.
Warning
It must be unique among all other test plugins.
Adding the Plugin to the org.locationtech.udig.test Feature
The easiest way to add a plugin to a particular feature is using the eclipse feature editor.
Navigate to the org.locationtech.udig.test feature while in the Java Perspective
Open the feature.xml file with the eclipse editor and select the Plug-ins tab
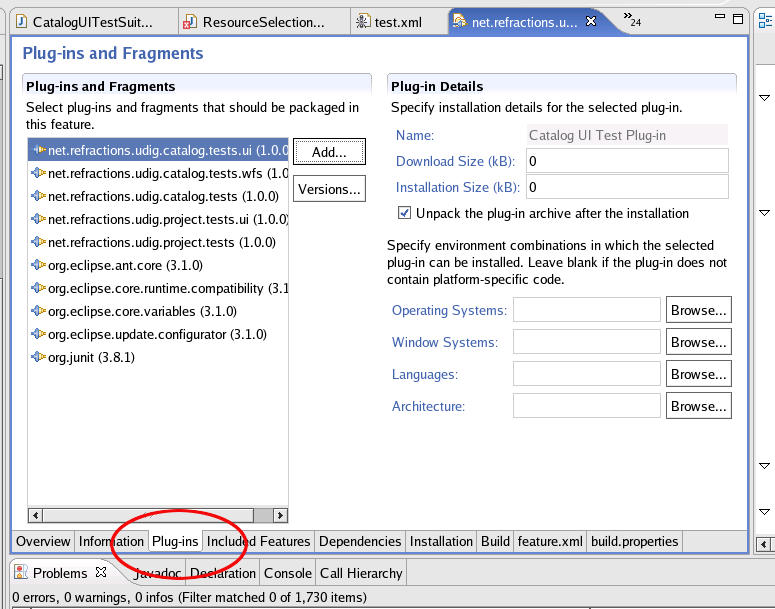
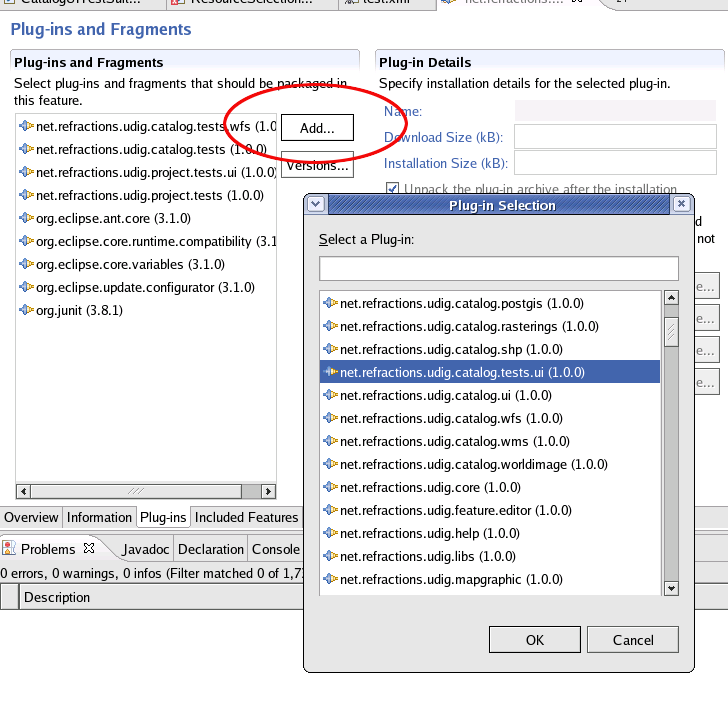
Click the Add button and select the test plugin from the pop-up dialog.
Click OK and save the feature.xml file
Adding the Plugin to the Automated Test Set
To add the plugin to the automated test set, you must check out http://svn.geotools.org/udig/trunk/scripts. This directory contains two files that must be modified.
- test.properties
- test.xml (different from the one above)
test.properties
This file contains a list of properties which map a test plugin name to an id,version tuple and looks as follows:
org.eclipse.test=org.eclipse.test_3.1.0
org.locationtech.udig.catalog.tests=org.locationtech.udig.catalog.tests_1.0.0
org.locationtech.udig.catalog.tests.wfs=org.locationtech.udig.catalog.tests.wfs_1.0.0
org.locationtech.udig.project.tests=org.locationtech.udig.project.tests_1.0.0
org.locationtech.udig.project.tests.ui=org.locationtech.udig.project.tests.ui_1.0.0
The name of the property MUST match the plugin-name declared in the test.xml file.
To add the catalog.tests.ui plugin, we would add the following property:
org.locationtech.udig.catalog.tests.ui=org.locationtech.udig.catalog.tests.ui_1.0.0
test.xml
This file is the root ant test script. It runs tests by delegating to the test.xml script created above. In order to have to the root script call your test.xml script, you must modify the target named all and add a call to your target. The all target is located near the bottom of the script and looks like the following:
<target name="all">
  <antcall target="catalog" />
  <antcall target="catalog.wfs" />
  <antcall target="project" />
  <antcall target="project.ui" />
</target>
To add the catalog.tests.ui plugin, we add the following line:
<antcall target="catalog.ui" />
The final step is to add a target which matches the name above.
This name MUST match the plugin-name property declared in the test.xml file created above}
The following is an example of a target:
<target name="catalog.ui">
   <antcall target="runtests">
     <param name="testPlugin" value="${org.locationtech.udig.catalog.tests.ui}"/>
     <param name="report" value="org.locationtech.udig.catalog.tests.ui"/>
   </antcall>
</target>
The target can be added anywhere in the file.
Warning
The testPlugin attribute must match the name of the property added to teh test.properties file.
Hint
The report attribute is the name that the test report will be published as
Note that the plugin required to run automated tests is “eclipse-test-framework-3.1.zip”, available here:
http://download.eclipse.org/eclipse/downloads/drops/R-3.1-200506271435/index.php