Distribute
This section shows how to export your product for others. We have a couple of things to do before we get down to running to product export wizard.
Include Images in Branding Plug-in Build
Everything that you wish bundled into a plug-in’s jar needs to be ticked off as part of the build.properties file.
We need to make all the files we need are included in our branding plug-in.
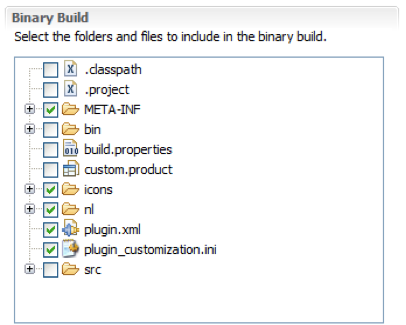
Open up MANIFEST.MF and switch to the Build tab.
- Check of the following files in the Binary Build::
icons nl plugin_customization.ini
Save the file and we can go on to the next section.
Product Export
And now we are in a good position to export.
Open up a file browser and delete the “runtime directory”.
Note
This directory (C:javaruntime-custom.product) was created when you were trying out the application earlier. Removing this directory has the same effect as clearing the configuration in the run dialog.
Return to the custom.product editor. Switch to the Overview tab
Click the Eclipse Product export wizard link to open up the Export wizard.
Change the Root directory field to custom.
Select the Archive file radio button and enter the destination zip file:
We can also uncheck “Generate metadata repository”
Hint
If the wizard fails a log file will be saved to the directory you indicate here.

Press the Finish button
Please wait: when finished custom-1.0.0.zip will be created.
Now unzip that folder and run your new application.
Note
To use this application your end users will need Java installed along with the JAI and ImageIO extensions.